Image Manipulation
This project focuses on image manipulation techniques using Adobe Photoshop. Students are required to select an image and transform it into three distinct visual outputs, showcasing their ability to creatively modify and enhance digital imagery. The final presentation must adhere to specific formatting and documentation guidelines, demonstrating both technical skill and design sensibility.
Assignment Brief.
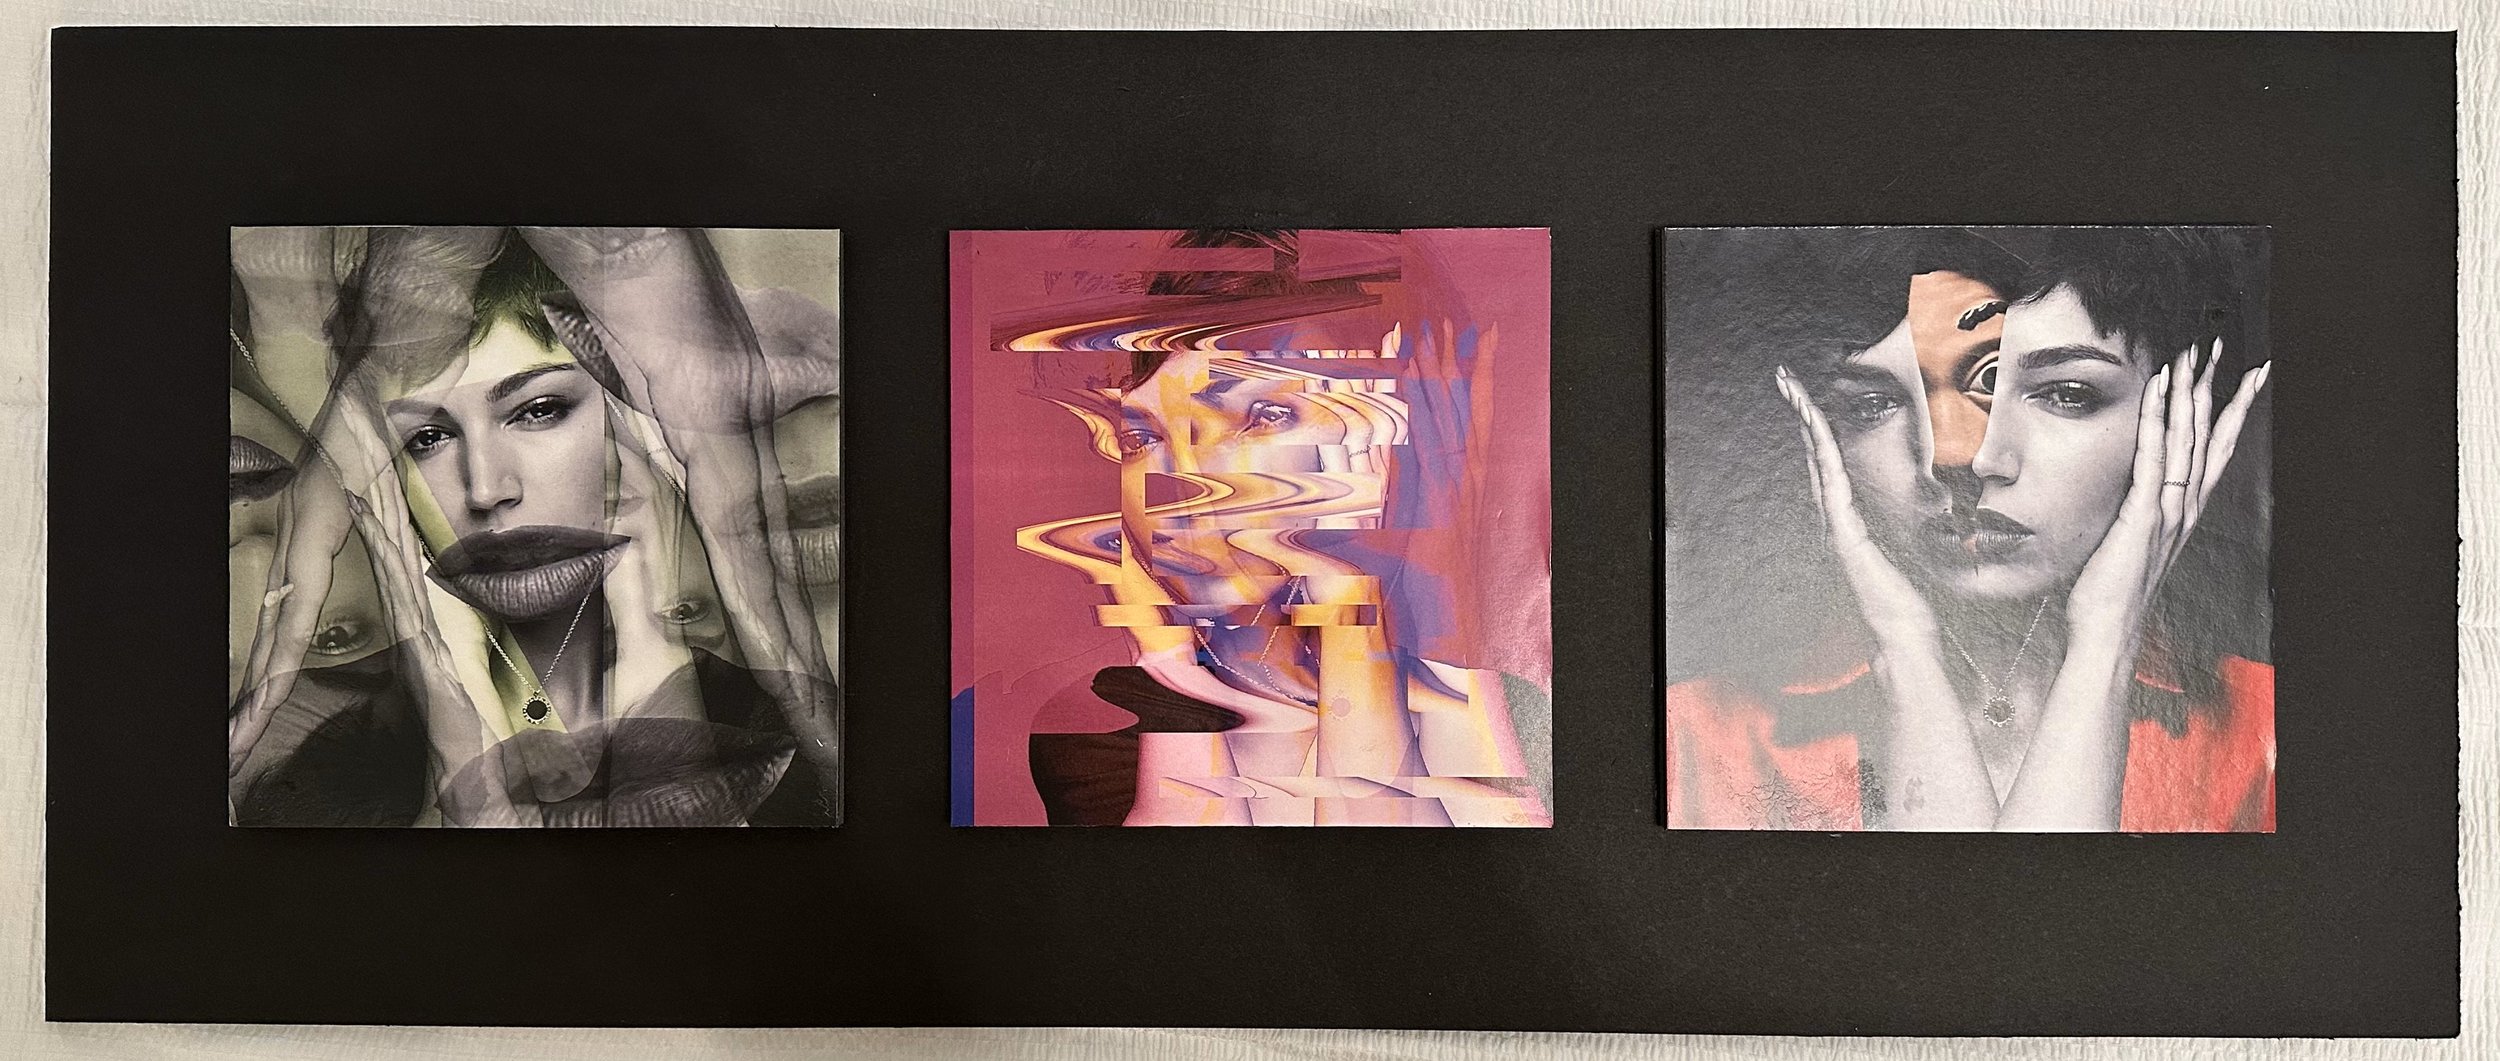
The assignment had specific guidelines to follow. I had to take one image and create three different manipulated versions, each printed at 6”x6” with 300 DPI. These images had to be arranged on a 24”x10” board with precise spacing—2-inch borders and 1-inch gaps between them. Additionally, I needed to incorporate three pop-up elements to add dimension and interaction.
Skills.


The process.
-
I began by choosing an image of Ursula Corberó that I found visually interesting. I brainstormed different ways to manipulate it, considering effects that would create contrast and visual impact while maintaining cohesion across the three variations.
-
Using Photoshop, I explored various tools and techniques to create three distinct compositions. I experimented with face-splitting effects, wave distortions, and layered transparency to develop unique interpretations. Throughout this process, I refined details such as color balance, opacity, and blending to ensure each edit looked polished.
-
Once I finalized the digital edits, I set up the 24”x10” board layout, carefully measuring and positioning the images to meet the project’s spacing requirements. I then printed the images at 6”x6” with 300 DPI to maintain high quality.
-
I precisely cut out the images and mounted them onto the board, ensuring proper alignment and spacing. Next, I designed and positioned the three pop-up elements to enhance depth and interactivity, making sure they were securely attached and well-integrated into the composition.
-
I compiled a step-by-step breakdown of my editing process, including screenshots and written explanations, and attached this to the back of the board along with the original image.
Image used.

Final Curation.
The last step was assembling everything into a cohesive presentation. I mounted the images carefully, ensuring proper alignment and spacing, then attached the original image and process documentation to the back. The pop-up elements were placed strategically to add visual interest. In the end, this project was not just about Photoshop skills but also about attention to detail, organization, and presentation. It was a great learning experience that helped me think more critically about digital manipulation and how to showcase creative work in a structured and compelling way.